Digging in a Steel Wall Pool - Pros & Cons + Instructions
Getting a steel wall pool? Is it necessary to place it in the ground?
With most steel wall pools, you have the choice of whether you want to install them as in-ground pools or leave them free standing as above-ground pools. But some pools need to be buried in the ground and cannot be left above ground. Such pools tend to have pool walls with a height of 150 cm or more. Oval steel wall pools with a lower water depth must also be installed in the ground if they do not have lateral supports. On the other hand, models that are not suitable for in-ground installation are rare. This applies to the Steinbach "New Splasher Secure" steel wall pool.
Should you place it in the ground or not?
This question of course only arises for those pools where this is even possible as per the manufacturer. Let's take a look at the pros and cons:
Pros:
- For many people, a steel wall pool only looks like the much longed for dream pool if it is sunk into the ground.
- Getting into the pool is easier
- Improved stability (which is comparable in freestanding pools!)
- Can also be more insulated than an above-ground pool
- Less heat loss in windy condtitions
Cons:
- Easier for children and animals to accidentally fall in (partial submersion can mitigate this factor)
- Expensive
- The pool walls do not absorb solar energy
- Unless a technical shaft is also dug in, a self-priming sand filter system (+ non-return valve) is necessary.
- There can be problems in case of rented property as this process involves extensive changes to the property
- Takes a lot longer to get the pool ready to use
- Once there's concrete, an in-ground steel wall pool cannot be moved any more. Relocating it to another property or even to a different location in the garden is impossible
Conclusion: You should weigh the pros and cons carefully before you decide. Since many factors including individual circumstances and personal taste have to be taken into consideration, it is not possible for us to make a blanket recommendation. If you decide to have an in-ground steel wall pool, here ate the steps to follow:
A guide to installing a steel wall pool in the ground
Make sure you have all the necessary tools and supplies before you get started. Here is a list of essential and optional items:
- cement
- 0/8 grit gravel (for lean concrete mix)
- mixing water
- optional: rolled gravel (for drainage, for waterproof floors)
- optional: 5cm XPS Styrodur panels for the floor (less heat loss to the ground)
- optional: 2cm styrofoam panels for walls
- tape measure
- saw (floor rails or handrails may need to be shortened)
- spirit level (we strongly recommend an additional straightedge)
- reinforcing iron bars for concrete slabs
- optional: marking spray or similar
- protective fleece
- construction foil
- skirting boards
- wire
- optional: a device such as a rotating laser for depth detection
- for round steel wall pools: cord and steel bolts
- ideally you should use an excavator to dig - digging with a shovel involves a lot of effort and will take longer
- arrange for the excavated material to be transported away
- large container or wheelbarrow for mixing concrete
Plan to work on the construction on days when it is not windy. Two people are the bare minimum required. Construction will be significantly easier with 3-4 people, especially when dealing with larger steel wall pools.
Technology shaft: yes or no?
Before you get started, you should think carefully about whether or not you want to install a technology shaft. Putting in a technology shaft allows the sand filter system and other pool technology to be installed underground and therefore out of sight. This not only improves the appearance of your steel wall pool but also significantly reduces the noise caused by your sand filter. This also prevents your sand filter system from running dry and does not need to be self-priming. But there are disadvantages too - it involves more work, more space and higher costs. The shaft should measure 1.5 x 1.5 x 1.5 m or more. Maintenance work becomes difficult if the shaft is smaller. Note that water that gets into the shaft (or is caused by condensation) must be allowed to seep away through the floor.
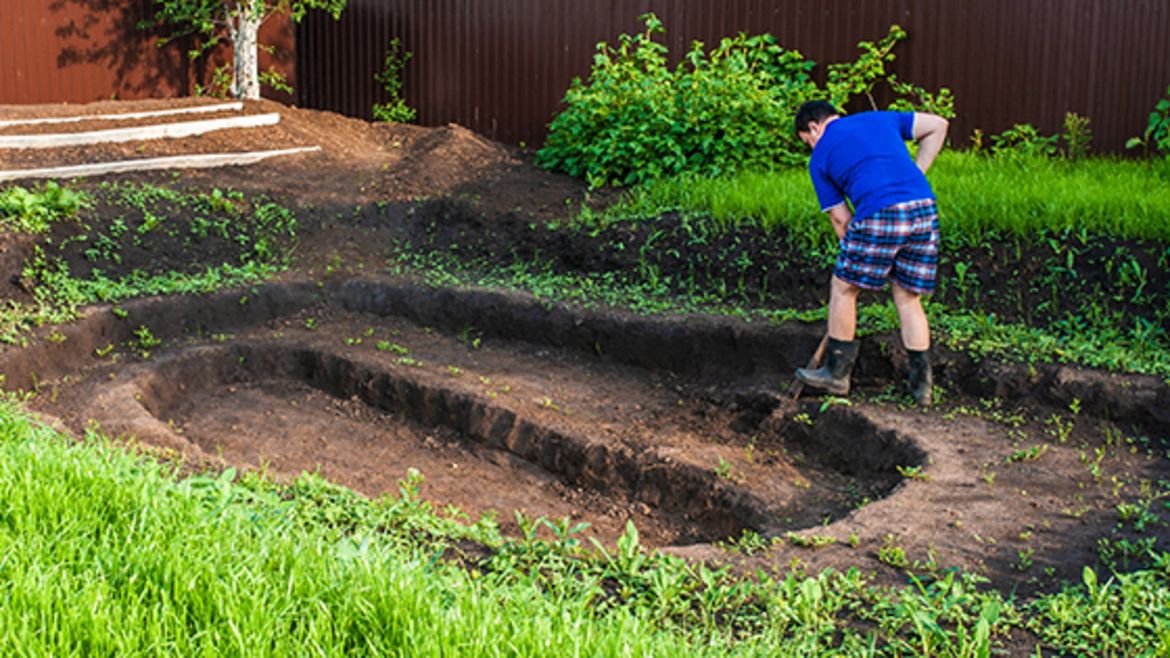
Digging in a steel wall pool: Process
Step 1: Mark the contours
If you decide to place your pool more than 45-50 cm under the ground, a lean concrete filling is absolutely necessary. This means that for a lean concrete filling you will have to excavate correspondingly more. Depending on whether you want to add insulation to the sides, you will need to dig about 15-25 cm more per side. Here are two examples, each with a pool size of 350x120 cm. a) Placing 40 cm deep - without lean concrete filling: An excavation with a diameter of approx. 355-360 cm is sufficient. b) Placing 60 cm or more deep - you will have to take into account the extra space required for the lean concrete. If you want additional styrofoam insulation on the sides, you should mark an area with a diameter of 390 cm. With round pools, you can drive a metal rod into the ground and tie a string to it. Pull the string tight up to the length of the radius of your pool and mark the ground with spray paint as you walk around the stick in a circle - this is your excavation area.
Step 2: The excavation
Next excavate the dirt from the area marked. If your steel wall pool is larger than 4 m and has to be buried deeper than 40 cm, the use of an excavator is strongly recommended! Note that the bottom of the trench will require a concrete floor slab, a drainage layer of gravel and possibly XPS Styrodur panels. The concrete slab itself should be about 15 - 20 cm thick. A different thickness may be necessary depending on the conditions in your garden. The XPS plates should be about 4-5 cm thick. In case of hard packed soils such as clay which are almost impermeable to water, a 10-20 cm thick layer of rolled gravel is recommended. Keep these factors in mind when calculating how deep you need to dig. Don't get rid of all the excavated dirt right away - you might need a small amount later to fill in the extra space if any around the pool walls.
The bottom needs to be absolutely level - otherwise, placing a steel wall pool in the ground will not work.
Is the excavation process done? Great! Now use a spirit level (ideally in combination with a straightedge) to check whether the bottom is level everywhere. It doesn't have to be absolutely perfect at this point because the concrete slab will go on top. But we recommend getting as clean a start as possible for the best results.
Step 3: Concrete slab at the bottom
A reinforced concrete slab at the bottom is highly recommended. Even if the soil seems very hard, large amounts of water and changing weather conditions over time might cause your pool to settle and sink unevenly. Tree roots can also cause problems. These can damage your pool liner or press rocks against the pool liner as they grow. A concrete slab will protect against these factors and will help achieve an absolutely flat and level base for your pool floor. This not only looks nicer but will also prevent pressure points on your pool in individual spots. In short: a concrete floor slab is an investment worth making and will pay off over the years.
Gravel as drainage
Next you will need to spread a gravel layer that is about 25cm thick. However, you MUST compact it down - it is best to use a machine to do so. The compacted layer should be about 20 cm thick.
Construction membrane
We recommend that you lay down construction membrane or foil on the layer of gravel. This prevents the concrete from losing too much water.
Reinforcement
You should build your pool such that you are able to use it for many years without any problems. Use steel mesh as a reinforcement to ensure stability. Use strips first so that the steel mesh is not in direct contact with the floor. Fix the steel rods in place with wire so that they do not move when concrete is poured on top.
Dig, pour concrete, spread and dry
Important: Do not use lean concrete for the concrete floor slab. You will need normal concrete for the slab so that the base is as stable as possible. Have 0-16 grit concrete delivered to you. Practical tip: It's better to order a little more than what you calculated so that you have a little excess in case you need it. Smooth out the concrete layer and make sure that your concrete slab is absolutely flat! Fill in any holes carefully. Any dents will be permanently noticeable and would also cause problems for the pool robot. Now the concrete needs to dry out. Aim for a drying time of around four days. If it's hot and dry, you will have to add some water so that it doesn't dry too quickly.
Next steps in construction:
Fleece, styrodur, click vinyl?
Now lay out pool fleece to give your pool liner extra protection. If you want to add insulation to prevent loss of heat to the ground, you can start with very strong Styrodur boards (there are different degrees of hardness). Place click vinyl over it to protect the Styrodur panels from pressure points - otherwise, there may be dents in the pool floor.
Assembling the swimming pool
Now it's time to assemble your steel wall pool. First lay the ground rails, taking care not to use the handrail instead! The steel walls are very sensitive to wind - you will need a second person to help you hold it up and shape it. Even a third person might be necessary in case of larger models. Keep a saw ready - sometimes the handrail and/or the floor rail might be longer than the steel wall and will need to be shortened. Once the steel wall is in place, you can spread the foil and attach it to the handrail.
Lean concrete backfill and wall insulation
Is your pool up? Excellent! Now attach about a 2 cm thick layer of styrofoam to the walls. Next fill up any remaining spaces around the steel walls with lean concrete. First fill 40 cm of water (no more!) in your steel wall pool. Then fill the gap outside the pool up to 30 cm with earth-moist lean concrete. The lean concrete should be mixed in a ratio of 1:8 (cement to 0/8 gravel) uncompacted and earth-moist. Repeat this step. You will need several hours or a day for this step. Note: The water level should always be slightly higher than the lean concrete fill.
Your steel wall pool is in the ground - you're nearly done!
At this point, a few things are still left to be done, such as connecting the single-build skimmer, sand filter system and so on. But most of the hard work is already done. We are in the process of preparing a guide for connecting sand filters. We also recommend thinking about how to heat your pool - there is after all nothing nicer than a heated pool. Refer to our guide "Heating your pool - Tips & Tricks" for ideas on how to have warm water in your pool.
Related products
-
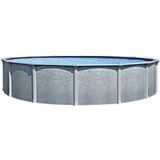
Steinbach Grande Pool Set Round Ø 549 x 135cm
- Water volume: 29m³
- Robust and stable
- Galvanised steel wall
-
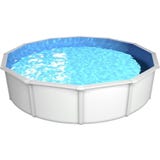
Steinbach Nuovo Pool de Luxe II Ø 550 x 120cm, Without Filter System
- Without Filter System
- White/Sand
- Water volume: 25.6m³
- With entry ladder
- Robust steel casing
-

Steinbach Nouvo Pool de Luxe II Ø 360 x 120 cm - Anthracite
- Water content 11 m³
- Galvanised steel jacket
- Wide handrail
-
Steinbach Styria Pool Oval 623 x 360 x 150cm, Blue
- Blue
- Sand
- Water volume: 26.6m³
- Robust steel walls
- Winter-proof pool liner